Showing posts with label natural. Show all posts

Monday, May 20, 2013

Photos from the... NEW STUDIO!! | Denver Portrait Photographer

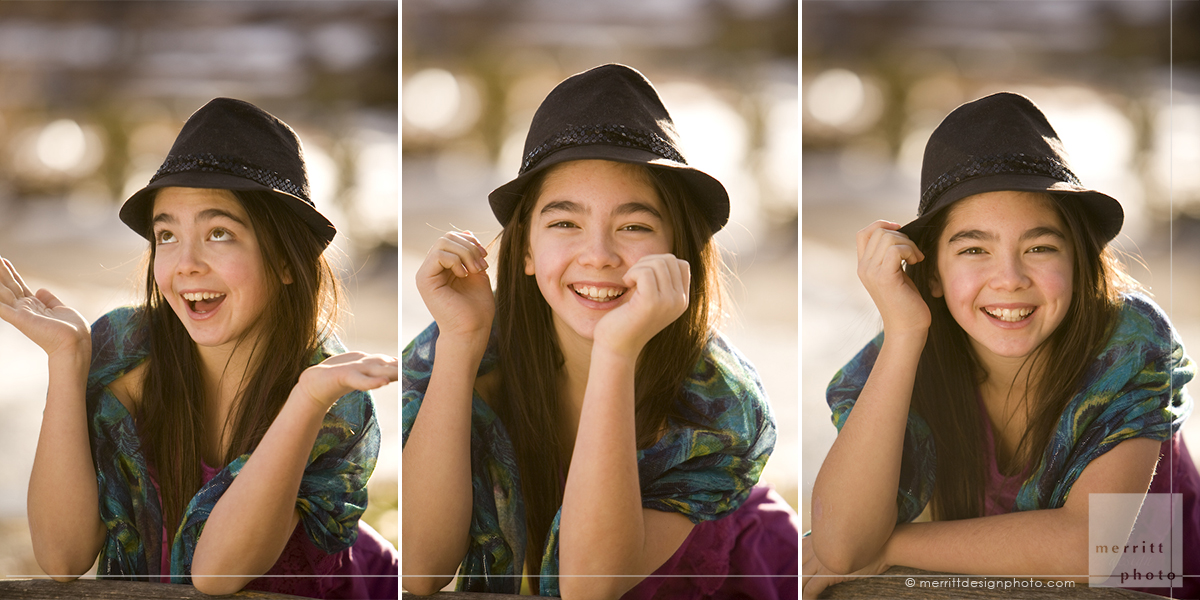
Meet Mica!

I had such a blast photographing this lovely young woman in my new natural light photo studio!

Mica is such a darling person -- and her vocal talents will blow you away (check out her website).


I'm so excited about this unique photo studio, located in a turn of the century historic cotton mill just west of Santa Fe on Evans.

Historic architecture makes for a wonderful backdrop, and throughout the building is the kind of incredible light that can best be found bouncing through historic leaded windows and off brick and whitewashed walls.

It is simply DREAMY.

The studio also features fun sets as an integral part of its authentic history, and the possibilities for amazing portraits, from traditional to more unique, are endless. 

I photographed this set right in the middle of the day, on a day mixed with direct sunlight and clouds. 

I am positively IN LOVE.


And then... there's this amazing blue wall... don't you just love it?!


And yes, more traditional studio photographs are possible in here, too... What a blast!!

Thank you to my amazing friend and model from today -- Mica, your radiance shines so brightly from within you!!

Monday, March 18, 2013

Head Shot Shoot-Off [ Denver Portrait Photographer ]

My boy and I both needed our head shots refreshed, so yesterday we took advantage of a lovely Sunday in Denver to have fun taking portraits of each other. He assists me on photo shoots from time to time, so thought it would be fun to let him be in charge of the camera and direction, to see what he could do.

In addition, since he's an actor, I have discovered this is a great way for him to learn what its like to be on BOTH sides of the camera.

He's a fine young photographer as well as actor, as it turns out!

We do have fun... I'm a lucky mom!!

Wednesday, February 13, 2013

Environmental Portraiture | Denver Colorado


Sometimes it still catches me off guard how much I love photographing people.

I mean, I'm a photographer. And I genuinely love people. So I'm not sure why this should surprise me, but it does.  I think it's my background: architecture doesn't move, or feel self-conscious. Or blink.

But seriously, even with the unpredictability inherent in photographing a person, I can hardly explain how much of a thrill I find in making a person FEEL how beautiful they are. Maybe there is some thrill in not knowing what I'll discover in that session. Finding a gorgeous spot of light, setting a person at ease, making someone smile from their eyes ... it gives me butterflies just thinking about it.

And when the result is a set of photos like this? Crazy love. Seriously.


Tuesday, January 24, 2012

Environmental Portraiture in Denver


I absolutely LOVED every minute of this shoot last weekend...

How can you go wrong with such a beautiful girl (a dear friend's daughter) who, it turns out, is a natural in front of the camera and enjoyed modeling as much as I enjoy shooting; a great photo assistant (her awesome mom!);  AND great light?

And who doesn't love wandering around Denver Botanic Gardens on a beautiful day in January?

Already excited for my next environmental portrait shoot!

Also, stay tuned... I'm chomping at the bit to share another project on which I've been hard at work for the past few weeks!

Thursday, September 8, 2011

Capture Philosophy | Photo Tip 04: Finding Portrait Light on Location

A week or so ago, I had the opportunity to work with talented Denver studio portrait photographer, Mark Pells, on an ambitious headshot project for the theatre department at my son's school.  

As a completely self-taught photographer and a HUGE fan of natural light, it was fascinating to watch Mark create magic with his studio lights.  I found it most interesting to learn that I am often drawn to or actively seeking out  the very conditions in the field, which he sought to create in the studio.

Thought I'd share a few of my personal favorite conditions through examples, in case you're curious to experiment the next time you're out photographing your family and friends.  

These are all photos I took on a single walk with my son on a bright, sunny afternoon in Denver (as you can see in the first photo below).  These photos were all taken with a 100mm macro lens with a Canon 5D, set on aperture priority (all shots are between apertures of 2.8 and 4.5).
Often, it is instinct for us to want to place our subjects in the sun.  But beware!  Direct sunlight can be a great dramatic tool when used intentionally, or with reflectors, fill light, etc., but if you are out with your camera and don't have such accessories (which I did not use for the shot above), not only will your subject likely be squinting, direct sunlight will create harsh shadows that generally aren't as flattering for skin tones, facial features, etc.  Thus, it is usually better to take the subject out of direct sunlight...
Once you take your subject out of the direct light, you'll have better luck getting even skin tones.  In this photo, light bouncing around from north and east facing windows at a coffee shop provided gorgeous, flattering conditions in the afternoon.  I simply exposed the shot to feature the correct amount of light in his eye and let the camera and natural light do the rest.  You can actually see the north facing windows reflected in his eye. 

In this shot, I asked my subject to stand in a spot of reflected light -- sunlight that was bouncing off the windows of a building across from us.  Beams of reflected light are fun to experiment with, and are a bit easier on the subject's gaze.  As you can see, while it still casts some dramatic shadows, it also can create fun magic in the eyes.
One of my favorite things to look for is nice, subtle bouncing light that is slightly weighted in its direction.  By that I mean that the light is essentially coming more from one side than the other creating a nice broad highlight on one side of the face, in this case, the side towards camera.  A darker background pops his face as the main focus of the composition.
These last two photos are shot on the same long wooden bench, but facing opposite directions.  In this first one, there is only indirect light on my subject, but an open area of VERY bright light behind him.  I exposed for his face (so essentially you'd need to OVERexpose if you were using a camera that meters for an overall scene), and I let the background go white.
For this photo, we switched positions so that the brighter area is now behind me (the camera), and it's a little easier to get a traditional photo with a nice tonal range, great skin tones and no hot spots.
And of course it never hurts to capture an impish grin :)

Happy shooting!!

Monday, January 17, 2011

Capture Philosophy | PHOTO TIP 01: Aperture + Depth of Field

I have been asked several times lately by new dSLR owners to share tips on simple ways to make the most of their camera and take better photographs.  Every time I get into this conversation, I realize how much I love sharing my passion for all things photographic.

Wide Aperture (f2.8) chosen for creative composition and shallow depth of field

So I thought it could be fun to start a “Capture Philosophy / Tip of the Month” series on the blog.  Some of the information I share will be basic, nuts and bolts tips for people just getting to know their dSLR cameras, while other posts may be more philosophical, reflective of how I personally approach photography.

Please feel free to comment and/or ask for more info!

I’d like to start with creative use of Aperture, since I believe it can be one of the simplest to learn and most powerful ways to make every day photos more creative.  Learning how to use Aperture and controlling your depth of field (the area of the photograph which is in focus) can produce highly satisfying results, from the ability to isolate a subject in an otherwise busy setting, to maintaining crisp focus from front to back of a wider landscape shot.
Small Aperture (f16) used to achieve depth of field form foreground shadows to mountain peaks

Wide Aperture (f2.8) used to highlight only tiny area of focus and blur everything else


Wide Aperture (3.2) isolates model and permits handheld shot in low light


Smaller Apertures can be extremely useful in capturing serene landscapes, formal compositions, and often is the best choice in architectural work, where one wants to highlight relationships across a room or between adjacent spaces.

When combined with higher ISO (when necessary), larger apertures will allow you to shoot later into the evening in lower light conditions.  This approach will often eliminate the necessity of a flash, allowing you to make the most of - and more importantly maintain the mood of - natural and available light.
THE BASICS

Aperture means literally, opening.  The basic creative tools of your camera are 1) choosing the size of the opening  (aperture), and 2) how long it stays open (shutter speed).

What you need to know regarding the aperture, is that the numbers, or F-stops, are representative of fractions, so the smaller numbers represent a larger opening of the shutter, (f1.4, f2.8, f3.5, f4, etc.), and larger numbers (f11, f16, etc.) represent a smaller opening of the shutter.

What makes this all so powerful is that with selective focus of a larger aperture, you can narrow in on a shallower depth of field and isolate your subject so that everything else in the photograph is out of focus.

Wide Aperture (f2.8) + faster shutter speed = shallower depth of field (isolated subject in focus)

Smaller Aperture (f16) + slower shutter speed = greater depth of field (more in focus)

SUGGESTION

Find the setting on your DSLR camera for "A" (aperture priority).  Play with the extremes of this setting to see what they do when you are focused on something close to the camera (say, within a few feet). Don't delete the photos until you have had a chance to look at the differences on your computer screen with the same shot and extreme aperture differences.
Isolating Eyelashes with f2.8

As a point of reference, shooting with an aperture of F2.8 when your subject is within close range of the camera can allow you to focus on someone's eye, and the rest of their face will start to soften.

When used creatively and intentionally, makes for really professional looking people photos...

You will notice that the range of depth of field changes with the distance from the camera... (F2.8 won't have as dramatic of an effect if your subject is far away).

So, get out of your "Program Mode" ... Experiment, and HAPPY SHOOTING!
Play with focus in unexpected ways - EXPERIMENT!